
Welcome to Any Video Editor User Guide!
If you need to capture a particular moment of your video clip and include it in your future movie, you can use a Snapshot option. The process of taking a snapshot is very quick and easy with Any Video Editor.
How to take snapshots in Any Video Editor?
Step 1: Import media to Any Video Editor
Step 2: Take snapshots from the playing movie
Step 3: Save picture
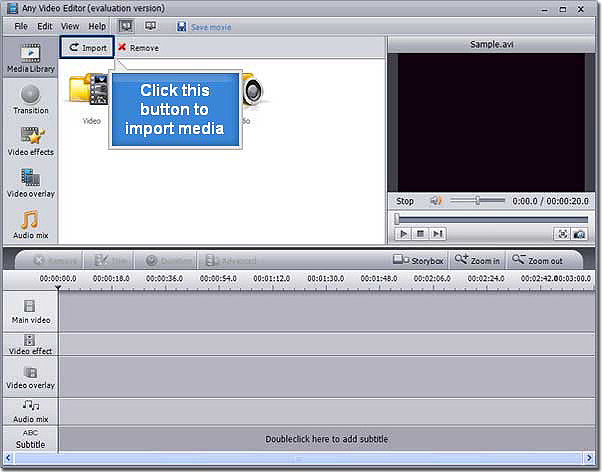
Step 1: Import media to Any Video Editor
Run Any Video Editor. Click the Import button within the Main Library pane to load the desired video files, audio files, or image files.
Select the necessary media files and click the Open button.
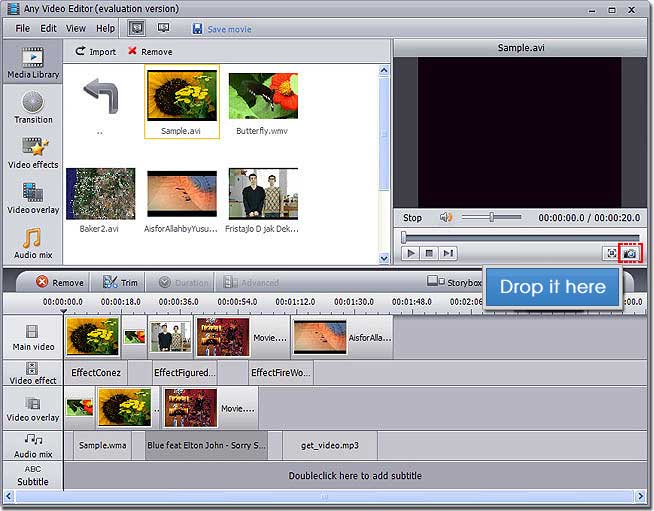
Step 2: Take snapshots from the playing movie
Place your video clip to the Timeline and find the necessary frame moving the Timeline cursor or using the slider under the Preview window. Then click the Snapshot button.
Step 3: Save picture
Once you click the Snapshot button, you will be prompted the following dialog window to save the picture.

Here you can specify the file location, enter the file name and save it in BMP format for your picture.
Finally press the Save button. In case you need to use this picture in your current project, just import it into the Files and Effects Area, place to the Timeline/Storyboard and continue your film creation.
Key Features of Any Video Editor:
* Support Extensive input media formats: all popular video, audio, image file formats
* Edit video, overlay video and image, mix audio, add image watermark
* Insert amazing transitions, apply special effects, and add external srt subtitles
* Split and join video and audio, trim out unwanted segments
* Preview all edits in real time without rendering the entire project
* Convert Video, Audio, and Photo to MP4, MPEG2, HDVideo or FLV
* Create stunning photo slideshows in three simple steps
* Fast video encoding speed
Sounds great?
Why not download and try Any Video Editor today?